Is It More Cost Effective To Build Your Own Aquarium?
Keeping an aquarium at home as a hobby can be a rewarding experience. An aquarium not only serves as an attractive centerpiece in your home. It’s also a great way to unwind and relax while watching the miniature ecosystem thrive. Many people consider the hobby as a costly one, though.
Luckily, if you plan to add an aquarium to your house, one approach is to build one. Although buying everything as a set is possible nowadays, it might be costly if you don’t have the budget yet. If you want to pursue your dream to have an aquarium at home, you can build one with the right materials and tools. The best part is that it will cost less and help you save. Remember to decide on the right size, type of glass, and gather the basic materials for assembly. You can visit Fish Lab to find out more about the materials you need to build your aquarium.
Check out the steps in building an aquarium with a budget in mind:
The Right Size
When building an aquarium, you should consider the different types. Choosing between 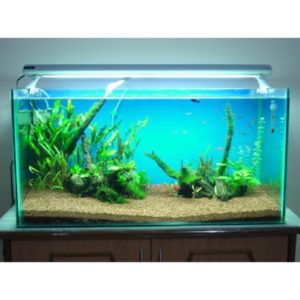 a small freshwater aquarium or an expansive reef tank can help.
The former is ideal if you have limited space at home, like when you’re living in an apartment or if you plan on installing your aquarium in your bedroom. This type is also the most affordable to buy and maintain, especially if you’ll only purchase a small tank. Some of the best freshwater fish for this setup include guppies, neon tetras, and mollies.
On the other hand, if you prefer to have an expansive reef tank, you must find a conducive area in your home first as it can take up a lot of space. Plus, you also have to consider the types of fish and creatures you’ll be putting together in this glass box so they can cohabitate harmoniously.
Figuring out the size that you want will allow you to focus on certain materials over others. You can also outline the setup of your tank early on. It will come in handy when decorating and save money on extra parts. Visualize what you want to achieve to make it easier on your part.
The Right Glass
The type of glass you will use is a vital component in any aquarium. Selecting the right one is important because you want it to house your pets for a long time. It might be best to start with a simple 20-gallon tank.
Moreover, a good option is ordinary plexiglass or acrylic in hardware or construction stores. It’s also flexible, capable of supporting an aquarium smaller than 25 gallons, and easy to manage. Nonetheless, it’s lightweight, so you can easily place it on top of a regular table. Its impact resistance is high, too, but its clarity can deteriorate as the material ages, especially when exposed to sunlight. Plexiglass is available in different variants, so you should consult a professional for buying options.
As for bigger tanks, plexiglass may not be a good choice as it’s prone to stains if certain chemicals are present. You have to think about the type of water you’ll use for your fish tank.
With this, you might want to opt for glass, which is cheaper and scratch-resistant. It can be heavy, though, with low impact resistance. However, its clarity remains constant with proper care and maintenance.
The Right Dimensions and Tools
Once you have the right type of glass, the next step is to prepare for the assembly. You can choose between having your glass cut by a specialist or doing it yourself with the appropriate tools.
Depending on the method you’ll choose, the glass walls should stand on the base and not be attached to the sides. The goal is to ensure steadiness and prevent cracks, which could lead to leaks. Aquarium walls typically come in sets of two, so the proportions of each should exactly match. The anterior and rear walls must have the same span as the base glass. As for the sidewalls, they should be slightly shorter than the side of the supporting glass where they will be attached.
Unless you can claim to be an expert in this type of handiwork, you should leave the cutting to professionals. These experts have the right equipment and technical know-how to perform the task safely and efficiently.
Assembling the Aquarium
The preparation and correct installation of the panels is vital when building a tank. Now that you have the appropriately-sized parts, you can then attach the panels with ease.
When applying silicone to the glass, place a steady stream of ¼-inch bead without any bubbles or gaps. If you want to achieve durable bonding, apply enough silicone within 3-5 minutes. Remember that, after this time, the silicone is likely to skin over and will no longer bond to the glass.
Apply a bead of silicone on the base glass for the rear and one side glass panel and one side edge of the rear panel, affixing the back glass panel on the base. Secure the side panel to the base and rear panel.
Once a panel is set into its position, smooth out the silicone. Do this by beginning at one tip of a connected section, push the tip of an index finger into the silicone. You could run it throughout the whole length of the silicone connection at a minimal angle.
Make sure that the section is secure in place with duct tape. Hold the section with duct tape. If there’s excess silicone around your finger, trim it off once it undergoes complete curing.
Conclusion
Building an aquarium is a good option if you want a cost-effective approach. Today, you can buy a fish tank along with basic aquarium equipment and tools if you have the budget to splurge. Luckily, you can build an aquarium if you have the right materials and tools to save money. Although it will need effort on your part, creating an aquarium not only saves you money, but it’s also a rewarding experience overall.
About the Author iPetCompanion Team
Related Posts
Melatonin as a known supplementary treatment for Cushing’s disease in dogs
Helping Your Pet with CBD Products
3 Facts To Know About The Costs Of Owning A Cat
The Benefits Of Treat Dispensers Featuring Puzzle Paws – A Pawsome Puzzle For Your Purrfect Puss
DOT Announces Upcoming Changes for ESAs and Plane Travel
Best Cleaning Tips for Your Aquarium
